Interact with your Dashboard
Create a Dashboard
On Reporting page, you can create a new dashboard by clicking on the (+) next to a folder:

Or you can use the Create menu when you are browsing dashboards

Dashboard Metadata
Dashboard Metadata is only available for Dashboard 3.0 and is not visible in Sharable Links and Embedded Analytics.
You can find useful information about your dashboard by clicking on More Info, which includes:
- Dashboard description
- Created time & person
- Last edited time & person
- Frequent viewers - Top 5 users who view the dashboard most frequently in last 30 days (excluding public users)
- Views - The number of dashboard views in last 30 days
- Favorites
Admins can hide the metadata in case of security risks. Find the option in Organization Settings > General Settings.
Add Dashboard Filters
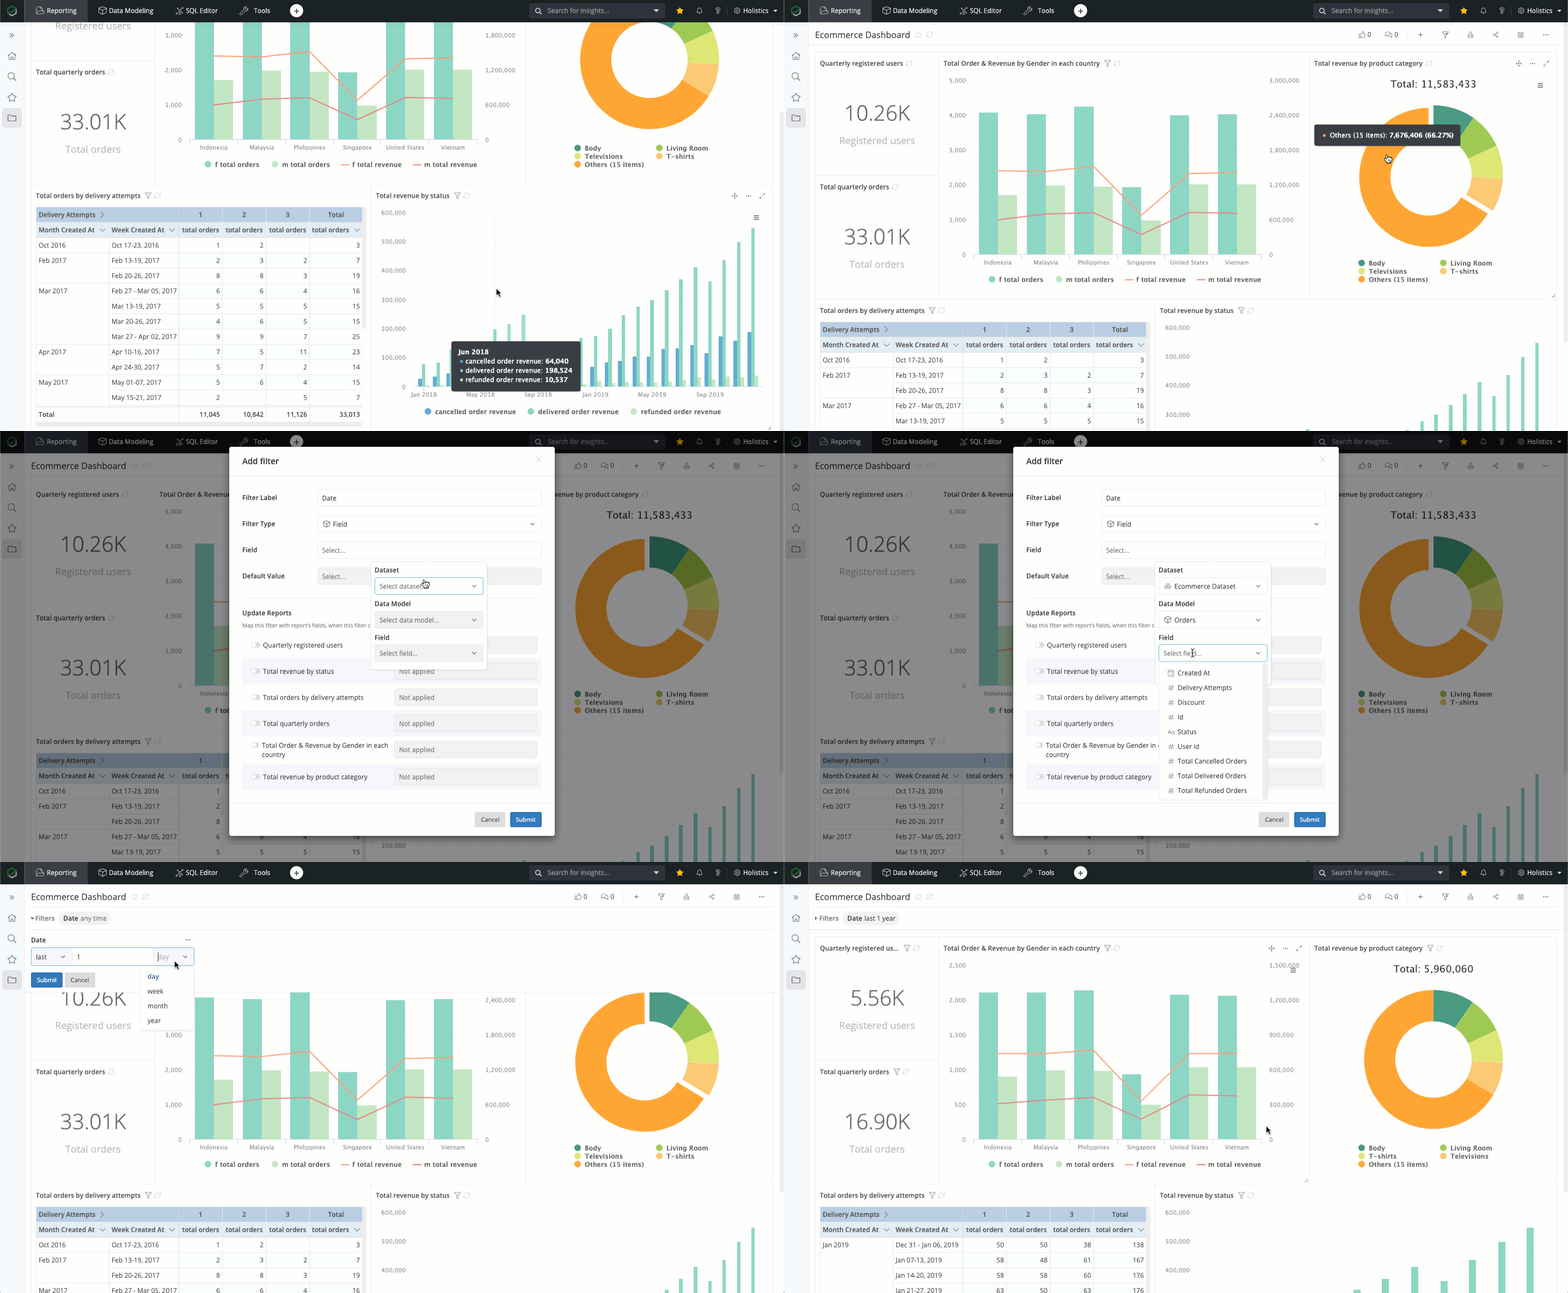
The basic steps to add a new dashboard filter are:
- In the dashboard, click on Add filter icon on the top right corner. The Add filter view will appear.
- Enter the name of your filter, and choose from the five types of filters (Field, Date, Text, Number, True/False).
- Enter a default value for your filter if necessary.
- Toggle on the widgets that you want to control, and map the filter to a widget's field Notes:
- You can only map the filter to fields of the same data type.
- You can map the filter to any field available in the widget's dataset, not just the ones you used to create the visualization.

Export your Dashboard
You can either download your dashboard as a static PNG/PDF snapshot, or set a schedule to deliver the snapshot regularly to you. Please refer to the Data Export for more details about this feature.

Share your Dashboard
You can give users in your organization access to a dashboard, or share it with an external party with a shareable link. For more details, please refer to the Permission System and Shareable Links documentation pages.

Pin Dashboards to Homepage
Pinning dashboards to the homepage allows admins to prominently display crucial dashboards for all users. This ensures broader visibility and easier access to key insights throughout your organization.
How to Pin a Dashboard to Homepage
- Navigate to the desired dashboard you want to pin.
- Locate the ellipsis button (...) on the dashboard view.
- Select the option "Pin Dashboard to Org Homepage."
Once pinned, the dashboard will be displayed on the Homepage for all users within your Organization who have the necessary permissions to view it.
For example, a pinned dashboard might only be shared with a user group in the Singapore region. Users from other regions who don't have access to that specific dashboard won't see it displayed on their Homepage.
Permissions and Visibility
Pinning Permissions: Currently, only users with the "Admin" role can pin and unpin dashboards to the Homepage.
Workspace Restrictions: Only dashboards located in Public Workspace can be pinned. If you want to pin Shared or Private dashboards, please move them to the Public Workspace.
User Access: As we shared above, not all users are allowed to see the pinned dashboards — it depends on their access permission. If a pinned dashboard isn't shared with all users, the system will prompt you with the "Edit User Access" modal. This allows you to adjust user permissions if necessary.

Pinned Dashboard Display Order: Recently pinned dashboards will show up first on the left side of the Homepage.
Other Dashboard options
If you click on the ... (More) symbol, you can see there are a few more things you can do with your dashboard:

- Dashboard Preferences: This section contains all important configurations of your dashboard, including the ones we have mentioned above.
- Embedded Analytics: Embed Holistics dashboard in your own application and make it available to your own customers. For more information, please refer to the Embedded Analytics documentation page.
- Lock: If you are an Admin, you can lock important dashboards to prevent other Analysts from making accidental changes.
- Duplicate: Quickly replicate your whole dashboard to a new one.
- Move to: Move your dashboard to another folder. Note that:
- If the dashboard is in the public workspace, it can only be moved within the public workspace.
- If the dashboard is in your private workspace, it can be moved out to the public workspace.
- Delete: Permanently remove your dashboard from the workspace. This action is irreversible.